Saturday, December 27, 2014

Korean Meat Patties

I grew up eating a ton of these meat patties A LOT around the holidays. They can be eaten as appetizers or as a side dish along with the meal. No need to worry about making a special dipping sauce for these gems. Just dip them in soy sauce and chow away :o)


Korean Meat Patties
(Source: My Mom)

Meat patties ingredients
1/2 pound ground beef
1/2 pound ground pork
1 small onion, finely diced
2 tablespoons carrot, finely diced
1 green onion, finely chopped
1 large garlic, finely chopped
12 ounces of firm tofu, squeeze the excess water with your hands
1 egg
Black Pepper
Sesame Seeds
1 tablespoon soy sauce
1 teaspoon salt
2 tablespoons vegetable oil
2 tablespoons sesame oil

Egg wash ingredients
4-5 eggs, whisked in a large bowl
Flour

Mix all of the meat patties ingredients together and form into  1 1/2 inch balls. Squish each ball down with your fingers a little bit so they turn into patties.  Dip all of the meat patties in flour so they have a nice layer of flour on all sides. Then dip them in the whisked egg mixture before cooking them on a hot griddle or skillet. Cook each side of the meat patty for about 2 - 3 minutes. 


Friday, December 26, 2014

Korean Beef Roll

One of my favorite Korean appetizers is the Korean Beef Roll. Basically, it's thinly sliced veggies and/or fruit rolled up in thin slices of Bulgogi meat. Plus, the hot mustard dipping sauce adds an extra pop of flavor that is absolutely addicting. I ask my mom to make these for me allllllll the time. So when I came home for the holidays, I finally got her recipe so I can make it myself.


Korean Beef Rolls
(Source: My mom)

Meat: 
1 1/2 pounds of thinly sliced bulgogi meat (or ribeye steak)
1 inch ginger, peeled and chopped finely
2- 3 cloves garlic, chopped finely
1 green onion, sliced finely
2 – 3 tablespoons onion, chopped finely
1/3 cup soy sauce
2 tablespoons corn syrup
1 tablespoon mirin
1 teaspoon sesame seed
1 tablespoon sesame oil
1 teaspoon black pepper
1 1/2 tablespoons sugar
1/4 of a large Korean pear, grated (optional)
Mochiko powder or Cornstarch to sprinkle on each piece of meat before it's cooked

Veggies/Fruit: 
2 red or orange bell peppers, julienned 
2 pears, julienned
2 cucumbers, julienned

Remove excess fat from the bulgogi meat. Sprinkle sugar in-between the thin slices of meat. Place in a large bowl and let it chill in the refrigerator for 6 hours or overnight. Drain the excess liquid from the bowl and set aside. In another bowl, mix together the ginger, garlic, green onion, onion, soy sauce, corn syrup, mirin, sesame seed, sesame oil, black pepper, and  1 1/2 tablespoons sugar. Lay a piece of meat flat in a bowl and spread a little bit of marinade on top. Then lay another piece of meat on the first piece of meat and spread a little bit of marinade on top. Keep repeating this process of layering meat on top of each other until the last piece. Let it marinate in the  refrigerator overnight. When ready to eat, sprinkle both sides of every piece of meat with Mochiko powder or cornstarch. Lay each piece on a skillet so it is flat. Let it brown on one side, flip, and brown the other side. It is absolutely imperative that each piece of meat is cooked flat as possible or these rolls will be really difficult to make. Place the cooked pieces of meat on a plate. 

Once every piece of meat is cooked on both sides and your veggies/fruit are julienned, you are ready to make these delicious rolls. Grab one piece of meat and place it on a flat surface. Grab a few pieces of julienned bell peppers, pears, and cucumbers and place them on the edge of the meat and roll it up. Slice each meat roll in half to serve as appetizers. Repeat with every piece of meat. Once you are done, serve them with the hot mustard dipping sauce below. 

Dipping Sauce: 
Make the mustard paste first.

Mustard Paste:
1 tablespoon Korean mustard powder (it must be Korean mustard powder or this recipe won't work)
1 tablespoon hot water

Mix together until well combined. Then combine this paste with the other sauce ingredients below.

Mustard Sauce
1 tablespoon Korean mustard paste (use above recipe)
2 tablespoons vinegar
2 tablespoons water
1 tablespoon sugar
1/2 teaspoon soy sauce
1 tablespoon sweetened condensed milk
1 1/2 teaspoons salt

Mix all ingredients together until well combined. Serve with the beef rolls. 


Apple Harvest Bread

This Apple Harvest Bread is a loaded version of pumpkin bread. Why is it loaded? Because it's packed with crisp Granny Smith Apples, raisins, and walnuts. Definitely a quick, easy, and delicous bread to make during the holidays. 


Apple Harvest Bread
(Source: Costco Cookbook)

2 cups flour
1/2 cup packed light brown sugar
1/2 teaspoon salt
1 teaspoon baking soda
1/2 teaspoon baking powder
1 teaspoon ground nutmeg
1 teaspoon ground cinnamon
1/2 teaspoon ground cloves
1 1/2 cups sugar
3/4 cup butter, softened
2 eggs
1 pound pumpkin, cooked and mashed (or 15-ounce can)
1 teaspoon vanilla extract
3-4 Granny Smith apples, peeled and diced (or shredded)
1/2 cup raisins (optional)
1/2 cup walnuts (optional)

TOPPING
2 teaspoons white sugar
2 teaspoons light brown sugar
1 teaspoon ground cinnamon

Preheat oven to 350°F. Grease 3 small loaf pans. Combine flour, brown sugar, salt, baking soda, baking powder and spices in a bowl. In another bowl, cream sugar and butter. Beat in eggs, pumpkin and vanilla. Add the flour mixture, stirring until just moistened. Stir in apples, raisins and walnuts. Spoon the batter into the prepared pans. Bake the loaves for 45-50 minutes, or until a toothpick inserted in the center comes out clean. Meanwhile, place all the topping ingredients in a small bowl and stir to blend. Set aside. When the bread comes out of the oven, sprinkle with the topping. Let sit for 15 minutes, then remove from the pans and let cool on a wire rack. Makes 12 servings.


Tuesday, December 23, 2014

Happy Holidays

Happy Holidays everyone! I flew home for Christmas on Friday and have been baking some more. Instead of creating three separate posts for each cookie, I decided to combine combine them into one post.

Cherry Delights

I've been eating these cookies ever since I was a kid. My mom baked these every year and I remember helping her out by sticking the cherry in the middle of each cookie. These cookies are chewy, slightly sweet, and the cherry adds that extra pop of flavor that make these cookies addicting. 


1 cup butter, softened
1/2 cup sugar
1/2 cup light corn syrup
2 eggs, divided
2 1/2 cups flour
2 cups nuts, finely chopped
Maraschino cherries, halved

Mix butter and sugar until fluffy. Stir in light corn syrup and egg yolks; mix well. Mix in flour. Chill. Roll into 1 inch balls. Dip into slightly beaten egg whites and roll in chopped nuts. Place on greased cookie sheets. Press candied cherry halves into centers. Bake in 325 degree F oven for 20 minutes.

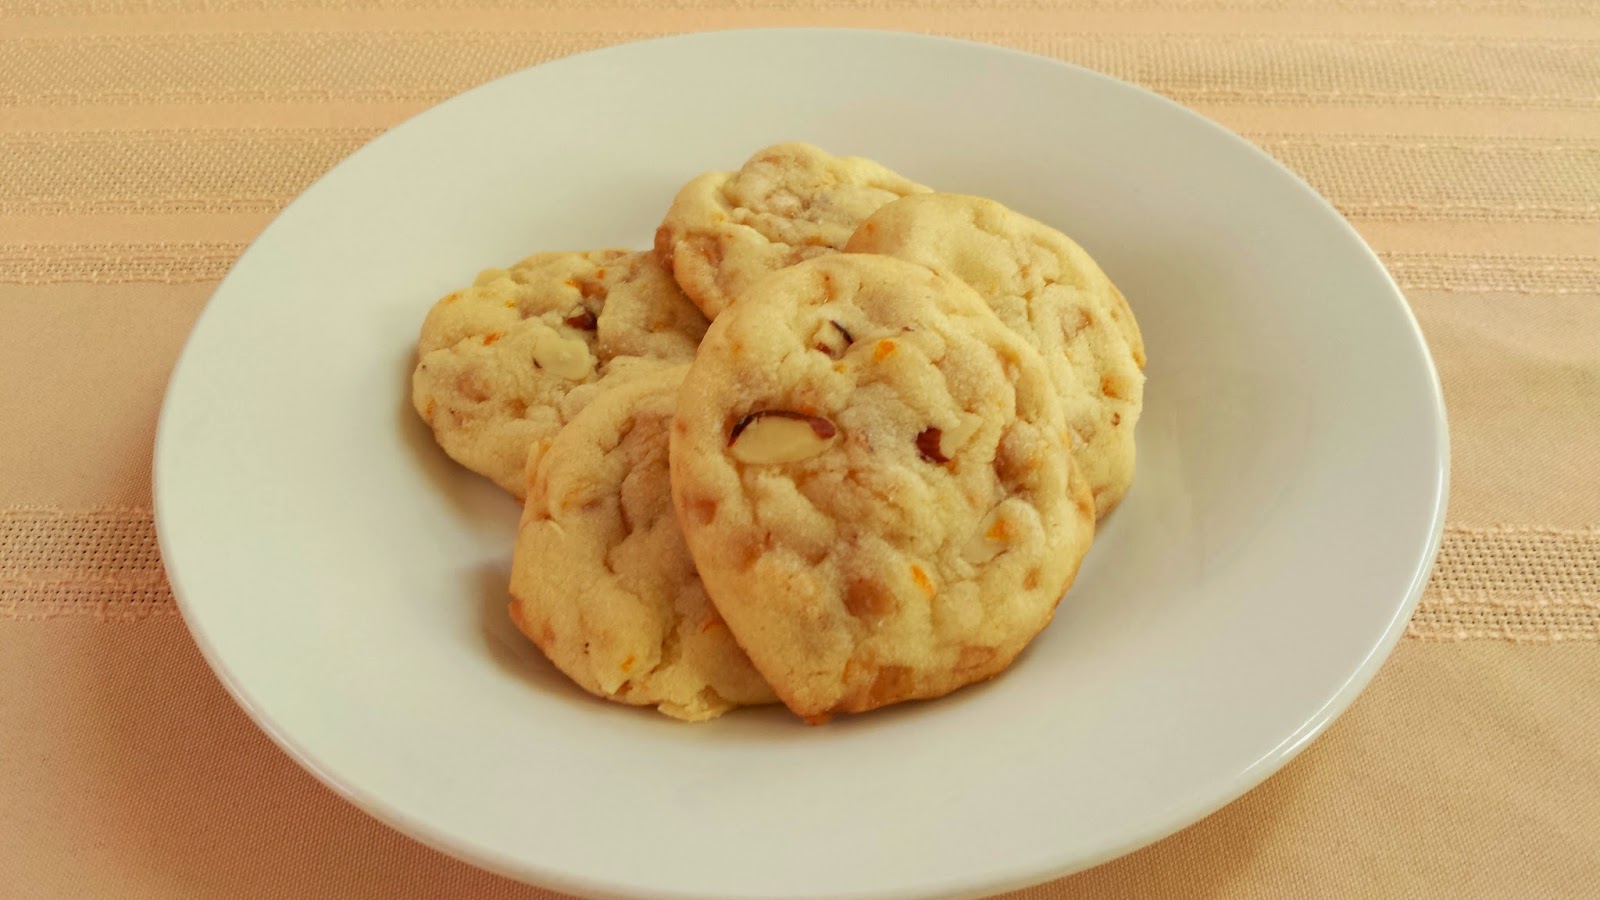
Orange Toffee Almond Sandies
(Source: Paula Deen)

I baked some sandies earlier this year that were absolutely delicious. These sandies are almost identical to those, except these have orange zest in the dough. I absolutely love anything that is flavored with orange around the holidays, so I gave these sandies a try and was not disappointed


1 cup butter, softened
1 cup vegetable oil
1 cup sugar
1 cup confectioners' sugar
1/4 teaspoon almond extract
1/2 teaspoon orange extract
2 eggs
4 1/2 cups all-purpose flour
1 teaspoon baking soda
1 teaspoon cream of tartar
1 teaspoon salt
3 tablespoons orange zest
2 cups sliced almonds
2 cups English toffee bits

Preheat the oven at 350 degrees F. In a mixing bowl, add the butter, oil and the sugars. Using a hand-held mixer, beat until combined. Beat in the extracts. Add the eggs, 1 at a time, beating well after each addition. Combine flour, baking soda, cream of tartar and salt in a separate bowl. Gradually add to the creamed mixture. Stir in orange zest, almonds and toffee bits. Drop by teaspoonfuls, 2-inches apart, onto ungreased baking sheets. Bake until golden brown, about 10 to 12 minutes. Remove from the oven to a wire rack to cool before serving.

Caramel Pecan Sticky Bun Cookies
(Source: Recipe Girl)

I'm addicted to sticky buns, so when I saw the recipe for these sticky bun cookies, I had to bake them for the holiday cookie tray. The dough is very similar to the Cherry Delights, but the center of the cookie is filled with a sticky pecan mixture. Needless to say, I several of these suckers in my mouth as soon as they came out of the oven. I'm sure these will be in my regular cookie rotation for years to come. 


COOKIES:
1 cup butter, at room temperature
1/2 cup granulated white sugar
1/2 cup dark corn syrup
2 large egg yolks
2 1/2 cups all-purpose flour

FILLING:
1/2 cup powdered sugar
1/4 cup butter
3 Tablespoons dark corn syrup
1/2 cup pecans, toasted and chopped
1 large egg white, slightly beaten

In large bowl, beat 1 cup butter and sugar until light and fluffy. Add 1/2 cup corn syrup and egg yolks; blend well. Stir in flour; mix well. Cover with plastic wrap- refrigerate 1 hour for easier handling. In small saucepan, combine powdered sugar, 1/4 cup butter, and 3 Tablespoons corn syrup; bring to a boil. Remove from heat. Stir in pecans. Refrigerate at least 10 minutes. Preheat oven to 375 degrees F. Lightly grease cookie sheets or line w/ parchment or silpat mats. Shape dough into 1 1/2-inch balls. Place 2 inches apart on greased cookie sheets. Bake for 5 minutes. Remove from oven. Brush tops of partially baked cookies lightly with egg white. With small spoon, carefully scoop about 3/4 tsp. of the filling in the center of each cookie; pressing down slightly. Return to the oven and bake an additional 6-9 minutes, or until light golden brown. Cool for 2 minutes and then remove from cookie sheets. Cool completely.


Thursday, December 18, 2014

Chocolate Covered Cherry Cookies

Dr. Sweetpea is a Chocolate Covered Cherry fanatic. He is the type that could down an entire box of Cordial Cherries in one sitting, not joking. So when I saw this Chocolate Covered Cherry cookie recipe in my America's Test Kitchen Holiday Cookbook, I knew that he would love these. I was definitely right because he devoured 4 cookies as soon as they came out of the oven. These cherry cookies never stood a chance! The chewy chocolate cookie, with the juicy cherry, and chocolate topping is over the top delicious. Definitely make these for your holiday cookie tray this year. 


Chocolate Covered Cherry Cookies
(Source: America's Test Kitchen)

1 1/4 cups all purpose flour
1/2 cup unsweetened cocoa powder
1/4 teaspoon baking soda
1/4 teaspoon baking powder
1/4 teaspoon salt
1/2 cup unsalted butter, softened
1 cup sugar
1 egg
1 1/2 teaspoons vanilla
30 maraschino cherries
1 cup semisweet chocolate chips
1/2 cup sweetened condensed milk

Preheat oven to 350 F. Mix the flour, cocoa, baking soda, baking powder & salt together, set aside. In a mixer beat the butter until softened. Add the sugar and cream the mixture until like & fluffy. Beat in the egg and vanilla. Add the flour mixture & beat until well mixed. Roll the dough into 1-inch balls & place them 2 inches apart on an ungreased cookie sheets. Use your thumb to make an indentation in the center of each cookie.

Drain the cherries reserving the juice. Remove the stems and place a cherry into the indentation in each cookie. Put the chocolate chips & condensed milk in a small saucepan. Stir over low heat until the chocolate is melted. Stir in 4 teaspoons of the cherry juice. Spoon 1/2 – 1 teaspoon of chocolate over the top of each cherry covering it completely. If the chocolate is too thick add a little more cherry juice. Bake for 6-7 minutes & cool on a rack.

Sunday, December 14, 2014

Chicken with Mustard Mascarpone Marsala Sauce

If you ask Dr. Sweetpea what his favorite Italian dish is, it would be Chicken Marsala. He absolutely loves the flavorful Marsala sauce and the tender pieces of chicken. I searched high and low for a great Chicken Marsala recipe that I can make at home and get rave reviews from Dr. Sweetpea. I collected about ten different recipes and finally settled on Giada's Chicken with Mustard Mascarpone Marsala Sauce. It's almost identical to your typical Chicken Marsala but the Mascarpone makes it creamy and the Dijon mustard adds a little bit of a bite. Needless to say Dr. Sweetpea LOVED his meal and wants me to make this for him regularly.


Chicken with Mustard Mascarpone Marsala Sauce 
(Source: Giada De Laurentiis)

1 1/2 pounds boneless skinless chicken breasts, each breast cut crosswise into 3 pieces
Salt and freshly ground black pepper
2 tablespoons olive oil
5 tablespoons butter, divided
3/4 cup sliced onion
1 pound cremini mushrooms, sliced
2 tablespoons minced garlic
1 cup dry Marsala wine
1 cup (8 ounces) mascarpone cheese
2 tablespoons Dijon mustard
2 tablespoons chopped fresh Italian parsley leaves, plus whole sprigs, for garnish
12 ounces dried fettuccine (I served mine with Risotto)

Sprinkle the chicken with salt and pepper. Heat the oil in a heavy large skillet over high heat. Add the chicken and cook just until brown, about 4 minutes per side. Transfer the chicken to a plate and cool slightly.

While the chicken cools, melt 2 tablespoons of butter to the same skillet over medium-high heat, then add the onion and saute until tender, about 2 minutes. Add the mushrooms and garlic and saute until the mushrooms are tender and the juices evaporate, about 12 minutes. Add the wine and simmer until it is reduced by half, about 4 minutes. Stir in the mascarpone and mustard. Cut the chicken breasts crosswise into 1/3-inch-thick slices. Return the chicken and any accumulated juices to the skillet. Simmer, uncovered, over medium-low heat until the chicken is just cooked through and the sauce thickens slightly, about 2 minutes. Stir in the chopped parsley. Season the sauce, to taste, with salt and pepper.

Meanwhile, bring a large pot of salted water to a boil. Add the fettuccine and cook until al dente, stirring occasionally, about 8 minutes. Drain. Toss the fettuccine with 3 tablespoons of butter and season, to taste, with salt and pepper. Swirl the fettuccine onto serving plates. Spoon the chicken mixture over top. Garnish with parsley sprigs and serve.


Saturday, December 13, 2014

Nutella Hazelnut Crinkle Cookies

Who doesn't love Nutella?! My love for this delicious spread goes way back to my childhood days when it was spread on a slice of toast and topped off with fresh strawberry slices. I've also had it on a crepe with sliced bananas, strawberries, and powdered sugar. Then when I left home to attend college, I bought a huge jar of Nutella and ate it with almost everything during finals week. So it's obviously not surprising that I made these Nutella Crinkle Cookies when I saw it in one of my cookie magazines. Making these cookies was very time consuming but definitely worth it because they are super chocolately/hazelnutty and perfectly chewy. Definitely try making these cookies this year for our cookie tray :o)


Nutella Hazelnut Crinkle Cookies
(Source: America's Test Kitchen)

3 cups all-purpose flour
2 teaspoons baking powder
1/2 teaspoon salt
1 1/4 cups Nutella
4 tablespoons unsalted butter, at room temperature
1 1/3 cups granulated sugar
2 eggs, at room temperature
1 teaspoon vanilla extract
1 teaspoon instant espresso powder
1/3 cup milk
2 cups hazelnuts, toasted, skinned and finely chopped
1 cup powdered sugar

Combine the flour, baking powder, and salt in a medium bowl; set aside. With an electric mixer on medium-high speed, beat the Nutella, butter, and granulated sugar until light and fluffy, about 2 minutes. Add the eggs, vanilla, and espresso powder and mix until incorporated. Reduce the speed to low and alternate additions of flour mixture and milk, starting and ending with the flour, and mixing until just combined after each addition. Fold in 1/2 cup of the hazelnuts. Refrigerate the dough until firm, at least 2 hours and up to 24 hours.

Preheat oven to 375 degrees F. Line baking sheets with parchment paper. Place the remaining hazelnuts and the powdered sugar in two separate bowls. Using a medium cookie scoop (or about 2 tablespoonfuls), roll the dough into balls, roll in the hazelnuts, then roll in the powdered sugar. Place the balls 2 inches apart on the baking sheets. Bake until the edges are set and the middle still looks a tad soft, about 10 minutes. Cool for 5 minutes on the baking sheet, and then transfer to a wire rack to cool completely. Store cookies in an airtight container at room temperature.


Thursday, December 11, 2014

Christmas Crack Cookies

My favorite season is here!!! My favorite season is here!!! What season is that?! It's Christmas Cookie baking season :o) 

I absolutely loooove dusting off my favorite cookie cookbooks to find new and interesting recipes to try each year. As much as I love trying new recipes, I also love making tried and true recipes every year too. I grew up eating these toffee bars made with saltines. These are super quick to make and very addicting...which is why I made these first to start off the holiday baking season.


Christmas Crack Saltines
(Source: Tampa Bay Times)

40 saltine crackers
1 cup (2 sticks) unsalted butter
1 cup brown sugar
1 (12-ounce) package chocolate chips
Chopped nuts

Preheat oven to 400 degrees. Cover cookie sheet with foil and coat lightly with a non-stick spray. Place saltine crackers in single layer on foil. On stove, melt butter and brown sugar. Bring to full boil and cook 3 minutes, stirring constantly. Remove and pour over crackers. Bake for 5 minutes (the brown sugar mixture will be very bubbly. It very important that this is baked for the entire 5 minutes or it won't harden properly). Sprinkle chocolate chips on top. Leave until melted, about 3 minutes. Spread out the chocolate and sprinkle with nuts. Refrigerate for at least 4 hours. Break into pieces. Store in airtight container in refrigerator. This will make up to 40 or more pieces, depending on how small or big you break them.

Sunday, November 16, 2014

Amazing Stuffed Peppers

Up until recently, I haven't been a fan of Stuffed Peppers. They almost always reminded me of my college days where they were served pretty frequently in my dorm cafeteria. Then I came across this recipe from America's Test Kitchen and it completely blew my mind. The peppers are perfectly tender and the filling is cheesy, meaty, and seasoned to perfection. Plus, these are super quick and easy to make! Definitely try making these yourself one day :o) 


Stuffed Bell Peppers

Salt
4 bell peppers (6 ounces each), 1/2 inch trimmed off the top, stemmed, and seeded
1/2 cup long-grain white rice
2 tablespoons olive oil
1 onion, chopped fine (I used 1 teaspoon dried onion flakes instead)
3/4 pound lean ground beef
3 garlic cloves, minced
1 (14.5 ounce) can diced tomatoes, drained with 1/4 cup juice reserved
5 ounces Monterey Jack cheese, shredded (1 1/4 cups)
2 tablespoons chopped fresh parsley
Pepper
1/4 cup ketchup

Bring 4 quarts water and 1 tablespoon of salt to a boil in a large pot over high heat. Add the bell peppers and cook until they begin to soften, about 3 minutes. Remove the peppers from the water, allowing any excess water to drain back into the pot. Place the peppers, cut-side up, on a paper towel lined plate. 

Return the water to a boil. Add the rice and cook until tender, about 13 minutes. Drain thoroughly and transfer to a large bowl. 

Meanwhile, heat the oil in a 12 inch skillet over medium-high heat, heat until shimmering. Add the onion and cook until softened, about 5 minutes. Stir in the beef and cook, breaking it into small pieces, until no longer pink, about 5 minutes. Stir in the garlic and cook until fragrant, about 30 seconds. Transfer the mixture into the bowl with the rice. Add the tomatoes, 1 cup of cheese, and parsley to the rice and stir to combine. Season the rice mixture with salt and pepper to taste. In a separate bowl, combine the ketchup and reserved tomato juice. 

Adjust an oven track to the middle position and heat the oven to 350 degrees. Places the peppers, cut side up, in a 9 by 9 inch baking dish. Divide the filling evenly among the peppers. Spoon the ketchup mixture over the tops of the peppers, then sprinkle them with the remaining 1/4 cup cheese. Bake until the cheese is browned and the filling is heated through, about 30 minutes.  


Saturday, November 8, 2014

Texas Roadhouse Rolls

So I finally caved and made the Texas Roadhouse Rolls that everyone has been pinning on Pinterest. I've never been to Texas Roadhouse but if their rolls are anything like the rolls that I made this weekend, then I TOTALLY understand why people are addicted. These rolls are super soft, pillowy, and have the perfect amount of sweetness. Dr. Sweetpea said these rolls look and taste like we bought them at a bakery. Definitely our favorite dinner roll recipe!


Texas Roadhouse Rolls
(Source: Pinterest and raininghotcoupons.com)

2 1/4 tsp Yeast (or 1 packet)
1 1/4 cup Milk
1/4 cup Honey
4 tablespoons melted Butter
1 large Egg
1 teaspoon Kosher Salt
4 cups Flour

Scald milk by boiling and then allow to cool to warm temperature. Add yeast, honey and milk to bowl and mix. Let it sit for at least 5 minutes (allow yeast to bloom). Put yeast mixture, 3 tablespoons melted butter, egg and 2 cups of flour into bowl of stand mixer.
Mix on low using the bread hook until smooth. Keep slowly adding flour until dough comes together. Add salt and allow to mixer to knead for 8 minutes. Flour work surface and turn out dough and knead for a few more minutes. Spray bowl with cooking spray and place dough in bowl. Cover with a damp cloth or plastic wrap and let rise in a warm place until doubled (about 1 hour). Spray 2 cookie sheets with cooking spray. Punch dough down and turn out onto a floured work surface. Roll dough into a rectangle, about 1/2” thick. Fold over and gently roll to seal together. Cut into 24 squares and place on prepared sheets about an inch apart.  Cover and let rise until almost doubled in size (about 40 minutes). Preheat oven to 350°. Bake 12-15 minutes or until golden brown. Brush with remaining melted butter.

Sunday, October 26, 2014

Chicken Marsala Meatballs

I love making meatballs at home since they are super easy to make and they aren't very time consuming. I was watching Giada on the food network a few months ago and saw an episode where she was making Chicken Marsala Meatballs. I saved the recipe and I finally got around to making these gems. Dr. Sweetpea LOVES Chicken Marsala, so I knew these would be something that he would enjoy. I'm super bummed that I waited sooooooooo long to make these! The Chicken Marsala Meatballs were FABULOUS! They were super tender and the sauce was perfect! I did add 2 teaspoons of cornstarch to thicken it up a bit though. I served the meatballs on top of homemade risotto to make it a meal.


Chicken Marsala Meatballs
(Source: Giada De Laurentiis)

1/4 cup panko breadcrumbs
2 tablespoons milk, room temperature
1/3 cup plus 1 tablespoon Marsala wine
1 pound ground white meat chicken
1/4 cup grated pecorino, plus extra for serving
1 large egg, beaten
2 tablespoons chopped fresh parsley
1 teaspoon kosher salt
1/8 teaspoon freshly ground black pepper
2 tablespoon extra-virgin olive oil
8 ounces cremini mushrooms, sliced
1 large shallot, minced
1 1/2 teaspoons flour
1 1/4 cups low-sodium chicken broth

Preheat the broiler to high.

In a large bowl, mix together the breadcrumbs, milk and 1 tablespoon Marsala. Leave to soak for 5 minutes. Add the chicken, pecorino, egg, parsley, 1/2 teaspoon of the salt and the pepper. With your hands, gently mix together the ingredients until just combined. Form the mixture into tablespoon-size balls and place on an oiled baking sheet. Broil for 5 minutes, or until the meatballs are beginning to brown and are just barely cooked through. Remove from the oven and set aside.


In a straight-sided skillet, heat 1 tablespoon of the olive oil over medium-high heat. Add the mushrooms and cook, stirring with a wooden spoon, until the mushrooms are brown on all sides, about 5 minutes. Add the shallots and the remaining 1/2 teaspoon salt and cook for another 2 minutes. Lower the heat to medium and stir in the flour and the remaining 1 tablespoon olive oil. Add the 1/3 cup Marsala and stir until the mixture is smooth. Whisk in the chicken broth and simmer for 5 minutes. Add the meatballs to the sauce and simmer for an additional 5 minutes to let the flavors blend. Serve hot, garnished with grated pecorino.

***Edit: 4/12/2015 - I have made this for Dr. Sweetpea several times now over the last few months. I have made a few changes to this recipe, and I think my adjustments creates a more pronounced Marsala flavor. I use 2 large shallots instead of 1. I also double the Marsala wine, so instead of 1/3 cup of Marsala wine, I use 2/3 cups of wine. I reduce the amount of chicken broth to 1 cup. To thicken the sauce, I mix 1 tablespoon of cornstarch with 2 tablespoons of water, create a slurry and mix it in after the chicken meatballs have cooked in the sauce for a few minutes.***

***Edit: 6/13/2015 - I made some more changes to the original recipe and Dr. Sweetpea said this version is the best that he has tasted so far. I doubled the panko in the meatball, so I used 1/2 cup of panko breadcrumbs. I used 2 large shallots instead of 1. To make the sauce more flavorful, I increased the Marsala wine to 1 cup and reduced chicken broth to 1 cup. I simmered the sauce longer so the wine could cook off before adding the chicken meatballs. To thicken the sauce, I mixed 3 tablespoons of wine with 1 tablespoon of corn starch to create a slurry. Then poured that mixture into the skillet to thicken the Marsala sauce.

Almost Hands-Free Risotto
(Source: America's Test Kitchen)

5 cups chicken broth
1 1/2 cups water
4 tablespoons unsalted butter
1 large onion, chopped fine
Salt and Pepper
1 garlic clove, minced
2 cups Arborio rice
1 cup dry white wine
2 ounces Parmesan Cheese, grated (1 cup)
1 teaspoon lemon juice

Bring broth and water to a boil in large saucepan over high heat. Cover and reduce heat to medium-low to maintain bare simmer. Melt 2 tablespoons butter in Dutch oven over medium heat. Add onion and 3/4 teaspoon salt and cook until onion is softened, 4 - 5 minutes. Stir in garlic and cook until fragrant, about 30 seconds. Stir in rice and cook, stirring often, until grain edges begin to turn translucent, about 3 minutes. Stir in wine and cook, stirring constantly, until fully absorbed, 2 - 3 minutes. Stir in 5 cups hot broth mixture. Reduce heat to medium-low, cover, and simmer until almost all liquid has been absorbed and rice is just al-dente, 18 - 19 minutes, stirring twice during cooking. Add 3/4 cup hot broth mixture and stir gently and constantly until risotto becomes creamy, about 3 minutes. Stir in parmesan. Remove pot from heat, cover, and let stand for 5 minutes. Stir in remaining 2 tablespoons butter and lemon juice. Season with salt and pepper to taste. Before serving, stir in remaining broth mixture as needed to loosen texture of risotto.

Tuesday, October 14, 2014

Spiced Upside-Down Apple Bundt Cake

So it's officially Fall!! Which means it's time to do a ton of baking using apples and pumpkin. Who doesn't love the smell of apple pie or pumpkin bread baking in the oven?! Anyhow, I wanted to do something different last weekend. One of my coworkers shared her Food and Wine cookbook with me and showed me the Spiced Upside-Down Apple Bundt Cake recipe. I'm so glad I made a copy of this recipe and made it over the weekend because it's SOOOOOOOOOOOO good! I'm pretty sure the streusal topping added a unique touch to this bundt cake. This is definitely one of my favorite apple cakes that I've tried over the last couple of years. Definitely try making this at home if you want bake something with apples this year.


Spiced Upside-Down Apple Bundt Cake
(Source: Food and Wine)

STREUSEL TOPPING
1/4 cup pecan halves
2 tablespoons rolled oats
1/2 cup plus 1 tablespoon all-purpose flour
2 tablespoons packed light brown sugar
2 tablespoons granulated sugar
3/4 teaspoon kosher salt
1/4 teaspoon freshly ground black pepper
1/8 teaspoon cinnamon
4 tablespoons unsalted butter, melted

CAKE
2 1/4 cups granulated sugar
1 1/2 teaspoons cornstarch
1/2 teaspoon freshly grated nutmeg
1/2 teaspoon cinnamon
1/4 teaspoon allspice
4 Granny Smith apples (2 pounds)—peeled, cored and cut into 1/2-inch dice
2 sticks plus 3 tablespoons unsalted butter, at room temperature
3 cups all-purpose flour
1/2 teaspoon baking soda
1 teaspoon kosher salt
1 cup buttermilk
1/4 cup Calvados
1/2 teaspoon pure vanilla extract
2 teaspoons finely grated orange zest
3 large eggs

Preheat the oven to 325°. On a parchment paper—lined baking sheet, toast the pecans for about 12 minutes, until lightly browned and fragrant. Let cool. In a medium skillet, cook the oats over moderate heat, tossing frequently, until fragrant and lightly toasted, about 4 minutes. Let cool.

In a food processor, pulse the flour with the toasted pecans until the nuts are finely ground. Transfer to a medium bowl and stir in the oats, light brown sugar, granulated sugar, salt, black pepper and cinnamon. Using a fork, stir in the butter until large clumps form. Spread the streusel on the parchment-lined baking sheet in a single layer and bake for about 25 minutes, until golden brown. Let cool. 

Increase the oven temperature to 350°. Generously butter and flour a 10-inch Bundt pan. In a large bowl, combine 1/4 cup of the sugar with the cornstarch, nutmeg, cinnamon and allspice. Add the apples and toss until the apples are thoroughly coated.

In a large skillet, melt 3 tablespoons of the butter. Add the spiced apples and cook over moderately high heat, stirring occasionally, until they're almost tender, about 6 minutes. Scrape the apples onto a baking sheet and refrigerate until they are cool, about 15 minutes.

In a medium bowl, whisk the flour with the baking soda and salt. In a measuring cup, mix the buttermilk with the Calvados and vanilla. In the bowl of a stand mixer fitted with the paddle, beat the remaining 2 sticks of butter and 2 cups of sugar with the orange zest at medium-high speed until fluffy, about 2 minutes. Add the eggs one at a time, beating well between additions. At low speed, in 3 alternating additions, beat in the dry ingredients and buttermilk mixture; scrape down the side of the bowl as necessary.

Spoon the cooled apples into the bottom of the Bundt pan, spreading them out. Scrape the cake batter over the apples and smooth the surface with a spatula. Bake the cake in the center of the oven for about 1 hour, until a toothpick inserted in the center of the cake comes out clean. Let the cake cool for 5 minutes.

Set a cooling rack on a baking sheet. Invert the cake onto the rack and scrape any apples stuck to the pan back onto the cake. While the apples are hot, pack the streusel topping over the top of the cake. Let stand until cool, about 1 hour. Slice the cake with a serrated knife and serve.


Sunday, October 12, 2014

Moussaka

I'm waaaaay behind on posting recipes on my blog! I have been cooking and taking pictures but I always seem to fall behind with posting recipes. That said, I made a wonderful Greek dish a few weeks ago and I'm finally getting around to posting it. It's a layered casserole style meal with potatoes, ground beef, eggplant, and topped off with bechamel sauce. It's definitely very time consuming to make, but well worth the time because it's delicious. Dr. Sweetpea devoured all of it within days! P.S. I know it looks ugly in the picture but I promise this Moussaka is absolutely delicious :o)


Moussaka
(Source: Brown Eyed Baker)

2 1/4 pounds eggplant, peeled and cut into ½-inch rounds
1/2 cup olive oil
1 yellow onion, grated
2 garlic cloves, sliced
2 pounds lean ground beef
16 ounces tomato puree
1/4 teaspoon ground allspice
1/2 teaspoon granulated sugar
Salt and pepper
1 egg white, lightly beaten
5 tablespoons finely chopped fresh parsley
5 tablespoons plain breadcrumbs
1 cup grated Parmesan cheese
2 1/4 pounds russet potatoes, peeled and cut into ½-inch rounds

For the White Sauce:
3 cups whole milk
3 tablespoons unsalted butter
3 tablespoons all-purpose flour
1/4 teaspoon ground nutmeg
Salt and white pepper, to taste
5 tablespoons heavy cream
3 egg yolks, lightly beaten

1. Sprinkle the eggplant slices with salt and let drain in a colander for 1 hour. Rinse, squeeze out any excess water and pat dry.

2. Heat ¼ cup of the olive oil in a large saute pan over medium heat. Add the eggplant and cook, turning occasionally, for 6 to 8 minutes, or until lightly browned on both sides (if you don't have a pan big enough, do this in two batches). Remove from the pan with a slotted spoon or spatula and drain on paper towels.

3. Reduce the heat to low and add the remaining ¼ cup of olive oil to the pan. Add the onion and garlic and cook, stirring occasionally, for about 5 minutes, or until the onion is softened. Increase the heat to medium, add the ground beef and cook, stirring and breaking up the meat with a spoon, for about 10 minutes, or until browned. Add the tomato puree, allspice, and sugar, and season with salt and pepper. Reduce the heat and simmer for 15 to 20 minutes, or until all the liquid has evaporated. Remove from heat and let cool, then fold in the egg white and parsley.

4. Meanwhile, prepare the white sauce. Place the milk in a small saucepan and bring to barely a boil, then remove from the heat. Melt the butter in a large, heavy skillet over medium heat, then stir in the flour and cook, stirring frequently, for 1 minute. Remove the pan from the heat and gradually pour in the hot milk, whisking constantly until the mixture is smooth. Return the sauce to medium heat and simmer, whisking constantly, for 10 to 15 minutes, until thickened and smooth. Remove from the heat, and whisk in the nutmeg, salt and pepper.

5. Preheat oven to 400 degrees F. Grease a 10x15-inch lasagna pan with butter and sprinkle with 2 tablespoons of the bread crumbs. Cover the base of the dish with the potato slices, overlapping them slightly. Spread half of the meat mixture on top and sprinkle with half of the Parmesan cheese and 2 tablespoons of the remaining bread crumbs. Cover with the eggplant slices, overlapping them slightly. Spread the remaining meat mixture on top, sprinkle with the remaining Parmesan cheese and the remaining breadcrumbs. (At this point, the dish may be covered and frozen. Thaw before baking.)

6. Whisk the cream and egg yolks into the white sauce and spread it evenly over the surface of the dish. Bake for about 50 minutes, or until the top is golden brown. Remove from the oven and let stand for 15 minutes before 

Saturday, September 27, 2014

Chicken Teriyaki

My mom makes the best Chicken Teriyaki ever! I'm talking big, juicy, tender pieces of Chicken covered in a delicious teriyaki sauce. I've been craving it when I moved to Minneapolis, and I finally got her secret recipe!


Chicken Teriyaki 
(Source: My Mom) 

1 pound package of chicken thighs, cut into strips
2 - 3 teaspoons soy sauce
1 - 2 tablespoons cornstarch 
1 - 2 teaspoons garlic powder
Black Pepper
1 red bell pepper
1 orange bell pepper
Green onion
Teriyaki Sauce

Combine chicken thigh strips, soy sauce, cornstarch, and garlic powder together in a large bowl. Once the chicken strips are completely covered with the mixture, let it rest in the refrigerator for 8 hours or overnight. A few minutes prior to making the chicken teriyaki, slice the bell peppers into long strips and cut the green onion into 2 inch pieces. Pour a couple tablespoons of vegetable oil in a large skillet and let the oil heat up a few minutes. Add the chicken thigh pieces and cook until browned on all sides. Add the bell peppers and green onion and let it cook for 3 -5 minutes. Pour in your favorite teriyaki sauce and serve! 


Sunday, September 14, 2014

Easiest Ever Chicken Pot Pie

I've been on a comfort food kick since it has been cold the last couple of days. So when I saw Chicken Pot Pie at Costco a few days ago, I couldn't get it out of my head and wanted to try making it at home. That said, a lot of the pot pie recipes I found online listed condensed cream of chicken soup (yuck) as an ingredient, so I was immediately turned off. Then I looked through my America's Test Kitchen Quick Family Meals Cookbook and saw the "Easiest Chicken Pot Pie" recipe. I thought it was suuuuuuper weird that Boursin Cheese was one of the ingredients but decided to girl it a whirl since it didn't list condensed soup. Honestly, this is the BEST Chicken Pot Pie I've ever had!!!! It's super quick to make and the Boursin Cheese makes it suuuuper creamy. I couldn't stop eating this by the spoonfuls and Dr. Sweetpea said this is the best Chicken Pot Pie ever! This is definitely something we will make again this fall :o)


Easiest Ever Chicken Pot Pie
(Source: America's Test Kitchen)

8 ounces white mushrooms, trimmed and quartered
3 cups shredded rotisserie chicken
1 (5.2 ounce) package Boursin Cheese, crumbled
1 cup low-sodium chicken broth
1/2 cup heavy cream
1 tablespoon cornstarch
Salt and pepper
1 1/2 cups frozen peas and carrots, thawed
Garlic powder (my addition)
Onion flakes (my addition)
Refrigerated Pillsbury Pie Crust

 Adjust oven rack to middle position and heat oven to 425 degrees. Microwave mushrooms on plate lined with 2 layers of coffee filters until softened, about 7 minutes. Meanwhile, combine shredded chicken, Boursin, broth, cream, cornstarch, 1/2 teaspoon salt, and 1/2 teaspoon pepper in large saucepan and cook over medium-high heat, stirring often, until cheese is melted and mixture is thickened, 5 to 7 minutes. Stir in microwaved mushrooms and peas and carrots. Season with salt and pepper to taste. (I also added some garlic powder and onion flakes for more flavor.) Carefully unroll one of the pie crusts and lay it on the pie plate. Pour chicken mixture over the pie crust. Carefully lay the second pie crust over the top. Tuck overhanging dough underneath itself to be flush with rim of pie plate. Cut three 1 inch steam vents into top of dough. Bake until filling is bubbling and crust is browned, about 25 minutes, rotating pie halfway through baking. Let cool slightly and serve. 

Tuesday, September 9, 2014

All American Beef Chili

It's definitely feeling like Fall here in Minneapolis. The sun rises later and sets earlier and the weather reporters are saying it won't even hit 60 degrees later this week. Whenever the temperature dips into the chilly range, I'm all about comfort food. I have been craving a delicious bowl of hot chili ever since it became September and decided to try the one in my America's Test Kitchen Cookbook. Their recipes are absolutely fool proof and I have never been disappointed with my meals. The plus side? It's sooooooooooooooo simple to make too! I devoured a big bowl in no time flat and Dr. Sweetpea had two big servings!!! Definitely try this recipe at home if you want a delicious and simple chili :o)


All American Beef Chili
(Source: America's Test Kitchen Family Cookbook)

2 tablespoons vegetable oil
2 yellow onions, finely chopped
1 red bell pepper, stemmed, seeded and finely chopped
1/4 cup chili powder
1 tablespoon ground cumin
1/2 teaspoon cayenne pepper
1 teaspoon salt, divided
6 garlic cloves, minced
2 pounds ground beef (85-90% lean)
2 (15-ounce) cans dark red kidney beans, drained and rinsed
1 (28-ounce) can diced tomatoes
1 (28-ounce) can tomato puree (I used tomato sauce)

Heat the oil in a large Dutch oven over medium heat until it is shimmering. Add the onions, bell pepper, chili powder, cumin, cayenne and ½ teaspoon of the salt. Cook until the vegetables have softened, about 7 minutes. Stir in the garlic and cook for another 30 seconds. Add the beef and increase the heat to medium-high. Cook, breaking up the beef with a wooden spoon, until no longer pink, about 10 minutes. Stir in the beans, diced tomatoes (with their juice), tomato puree and the remaining ½ teaspoon salt. Bring to a simmer, then reduce the heat so it maintains a slow simmer, cover and cook for 45 minutes. Remove the lid and continue to simmer for an additional 45 minutes. Season with additional salt and pepper to taste before serving. Garnish with shredded cheddar cheese and sour cream, if desired. Leftover chili can be stored in an airtight container in the refrigerator for up to 4 days. The chili can also be frozen for up to 1 month.

Saturday, September 6, 2014

Limoncello Tiramisu

It's starting to get cold in Minneapolis, so for my last summer treat, I decided to make my infamous Limoncello Tiramisu. It's very similar to a traditional Tiramisu recipe except that the lady fingers are dipped in a Limoncello mixture. This is seriously the best dessert to eat while sitting on your balcony while enjoying the last days of summer.


Limoncello Tiramisu
(Source: Culinary SOS)

3 large eggs (separated)
1 cup powdered sugar
1 tablespoon lemon zest
2 cups whipping cream
1 pound mascarpone cheese
1 cup limoncello
2 cups milk
About 5 dozen ladyfinger cookies
2 to 3 tablespoons cocoa powder
About 1 cup shaved white chocolate

In the bowl of a stand mixer using the whisk attachment, or in a large bowl using a hand mixer, beat together the egg yolks, powdered sugar and lemon zest until light and pale, 3 to 5 minutes. Add the whipping cream and mascarpone and continue to beat (if using a stand mixer, switch to the paddle attachment) until fluffy. Transfer the mixture to a large bowl if using a stand mixer. In a separate bowl, whip the egg whites until stiff peaks form. Gently fold the whites into the mascarpone base. Set aside. In a medium bowl, whisk together the limoncello and milk. Quickly soak the ladyfingers in the limoncello mixture and use them to line the bottom of a 13-by-9-inch baking dish. Gently spoon over about half of the whipped mascarpone mixture, smoothing it over the soaked ladyfingers. Add another layer of soaked ladyfingers, then cover with the remaining whipped mascarpone mixture. Refrigerate just until chilled, about 2 hours. Serve within a few hours of assembly. Before serving, sprinkle over the cocoa powder and top with shaved white chocolate.


Four Cheese Pizza

My parents went on a Hawaiian cruise earlier this year and they kept talking about the 4 cheese pizza they ate on the ship. It's a little different than the pizza that we're all used with pizza sauce but it's SOOOOOO good! It's also super easy to make, especially when you use Naan as the pizza crust.


Garlicky Four Cheese Naan Pizza
(Source: My parents)

1 store bought Naan
Garlic infused olive oil
Crumbled Gargonzola Cheese
Shredded Provolone Cheese
Shredded Parmesan Cheese
Shredded Mozzerella Cheese

Drizzle garlic infused olive oil on Naan and spread around using a pastry brush. Then sprinkle the four different cheese over the Naan and bake at 350 until the cheese is melted and golden on top. 


Wednesday, August 20, 2014

Baklava Cookie Bars

So I absolutely LOVE Baklava! The crunchy, sweet, nutty, sticky little gems are addicting yet expensive when you buy them in grocery stores. I tried making them at home and failed miserably because it's really time consuming to make and fillo dough is incredibly finicky. I was about to throw in the towel until I came across these Baklava Cookie Bar recipe on Betty Crocker. It's seriously the best of both worlds because it's part cookie and part Baklava. The best part? The Baklava portion of the cookie tastes exactly like the real deal but with the fraction of the work!


Baklava Cookie Bars
(Source: Betty Crocker)

Cookie Base
1 pouch (1 lb 1.5 oz) Betty Crocker™ sugar cookie mix
1/2 cup butter or margarine, softened
1/2 teaspoon grated lemon peel
1 egg

Filling
1 1/2 cups chopped walnuts
1/3 cup granulated sugar
1/4 cup butter or margarine, softened
1 teaspoon ground cinnamon
1/8 teaspoon salt
8 frozen mini fillo shells (I used all the mini fillo shells from a 1.9 oz package)

Glaze
1/3 cup honey
2 tablespoons butter or margarine, softened
1 tablespoon packed brown sugar
1/2 teaspoon lemon juice
1/4 teaspoon ground cinnamon
1 teaspoon vanilla

Garnish
5 tablespoons honey

Heat oven to 350°F. Spray bottom only of 13x9-inch pan with cooking spray. In large bowl, stir cookie base ingredients until soft dough forms. Press dough in bottom of pan. Bake 15 minutes. Meanwhile, in medium bowl, stir walnuts, granulated sugar, 1/4 cup butter, 1 teaspoon cinnamon and the salt with fork until mixture is well mixed and crumbly. Sprinkle nut mixture evenly over partially baked base. With hands, crumble frozen fillo shells evenly over nut mixture. Bake 18 to 20 minutes longer or until golden brown. Meanwhile, in small microwavable bowl, microwave 1/3 cup honey, 2 tablespoons butter, the brown sugar, lemon juice and 1/4 teaspoon cinnamon uncovered on High 1 minute or until bubbly. Stir in vanilla. Drizzle honey mixture evenly over fillo. Cool completely, about 2 hours. For bars, cut into 6 rows by 4 rows. Before serving, drizzle 1/2 teaspoon honey over each bar. Store covered at room temperature.


Tuesday, August 19, 2014

Spicy Maple Chicken Drummies

Want an easy and quick dinner to make during the week? This drumstick recipe is absolutely amazing! So simple to make and so flavorful. The only change that I made was doubling the sauce so Dr. Sweetpea and I could drizzle some over our chicken before devouring the drumsticks.


Spicy Maple Chicken Drummies
(Source: Pillsbury)

1/2 cup real maple syrup or honey
1/2 cup Heinz chili sauce
4 tablespoons chopped fresh chives
2 tablespoons soy sauce
1 teaspoon ground mustard
1/2 teaspoon ground red pepper (cayenne), if desired
2 pounds chicken drummettes (about 20) ---we used drumsticks

Heat oven to 375°F. In small bowl, mix all ingredients except chicken. In ungreased 15x10x1-inch pan, place chicken. Pour syrup mixture over chicken; turn chicken to coat. Bake uncovered 45 to 55 minutes, turning once and brushing with syrup mixture after 30 minutes, until juice of chicken is clear when thickest part is cut to bone (180°F). Serve chicken with syrup mixture.

Sunday, August 10, 2014

Creamy Salty and Sweet Spirals

A couple years ago, I decided to make my mom's creamy spirals and take it to work for a potluck. I had all the ingredients on hand except the chopped red peppers, so I substituted dried cranberries for the red peppers and it made this spirals even better. I now exclusively use dried cranberries since they add a tangy/sweet flavor and balances out the saltyness from the ranch. 


Creamy Salty and Sweet Spirals

2 (8 oz) packages of cream cheese, softened
1 package of ranch dip mix
Chopped green onions
1 package of dried cranberries
Chopped black olives
Flour tortillas

Mix cream cheese and ranch dip mix. Spread a thin layer of mixture on tortillas. Sprinkle green onions, dried cranberries, and black olives over the cream cheese. Roll up tightly and wrap in plastic wrap overnight. Slices rolls into 1/2 inch pieces before serving. 
 

Tuesday, August 5, 2014

Garlic Roasted Potatoes

Looking for a quick and simple way to use your red potatoes??? Garlic Roasted Potatoes are it! Plus, if you're a huuuge fan of garlic like us, than this is going to be a double hit since the garlic makes this side dish super flavorful. 


Garlic Roasted Potatoes
(Source: Ina Garden)

3 pounds small red or white potatoes
1/4 cup good olive oil
1 1/2 teaspoons kosher salt
1 teaspoon freshly ground black pepper
2 tablespoons minced garlic (6 cloves)
2 tablespoons minced fresh parsley

Preheat the oven to 400 degrees F. Cut the potatoes in half or quarters and place in a bowl with the olive oil, salt, pepper, and garlic; toss until the potatoes are well coated. Transfer the potatoes to a sheet pan and spread out into 1 layer. Roast in the oven for 45 minutes to 1 hour or until browned and crisp. Flip twice with a spatula during cooking in order to ensure even browning. Remove the potatoes from the oven, toss with parsley, season to taste, and serve hot.